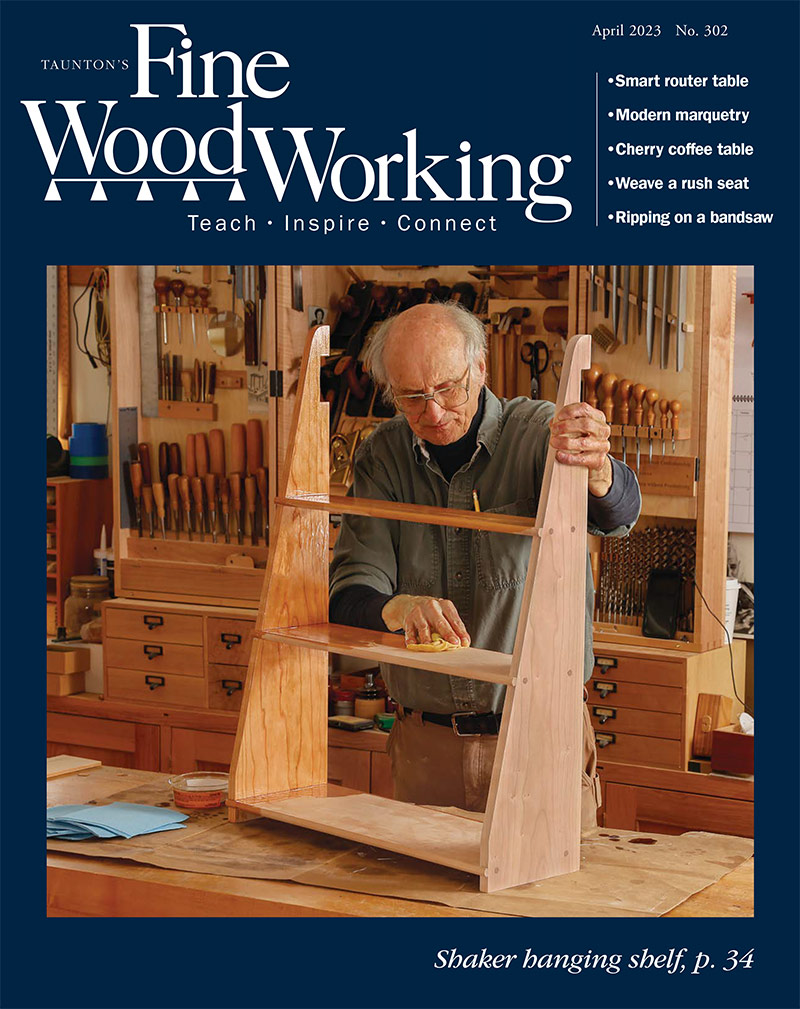
Ship-inspired wall shelf
Graduated shelves and graceful symmetry hang on a single stud.
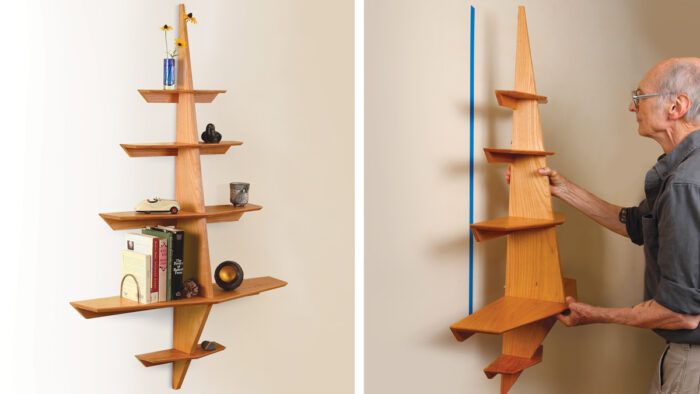
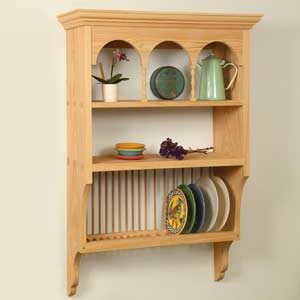
Synopsis: The center rib of this shelf holds five graduated shelves with different thicknesses, widths, and lengths. The design is based on the mast and spars of a sailing ship. The main rib is the infrastructure that locks the shelves and their supports in place.
I have a thing for wall-mounted furnishings, be they clocks, lamps, cabinets, or shelves. The latest design is based on the mast and spars of a square-rigged sailing ship. It is designed to be light, graceful and strong, for display of books, DVDs, art objects, or just your collection of knickknacks. The whole shelf is designed to hang on a single stud. Like the spars on a ship, the shelves get thinner and smaller as they go farther up the rib.
Start with the center rib
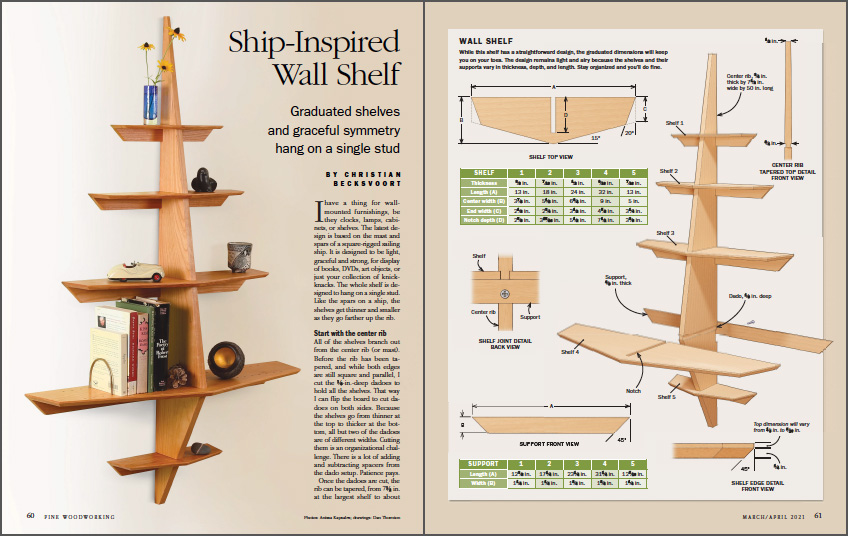
All of the shelves branch out from the center rib (or mast). Before the rib has been tapered, and while both edges are still square and parallel, I cut the 1⁄8-in.-deep dadoes to hold all the shelves. That way I can flip the board to cut dadoes on both sides. Because the shelves go from thinner at the top to thicker at the bottom, all but two of the dadoes are of different widths. Cutting them is an organizational challenge. There is a lot of adding and subtracting spacers from the dado setup. Patience pays.
Once the dadoes are cut, the rib can be tapered, from 7-1⁄2 in. at the largest shelf to about 1 in. at the top and bottom. I do this on the bandsaw, and then I clean up that cut at the bench with a handplane. The section above the top shelf is then gently tapered on both sides, to about 1⁄2 in. thick at the tip, again at the bench with handplanes.
Five different shelves
Next I cut the shelves. These are all different lengths, widths, and thicknesses. The extra effort to do this contributes to the grace of the piece. It would be very clunky if everything had the same dimensions. Once the shelf blanks are milled, I locate the center and cut a 1⁄2-in. slot to fit and correspond to the dadoes cut into the center rib. Then I taper each shelf on the bandsaw from the center to both ends. I also cut a 20° angle on the ends. Finally, to make the shelves look even lighter, I rout the undersides of the three visible edges at 45°.
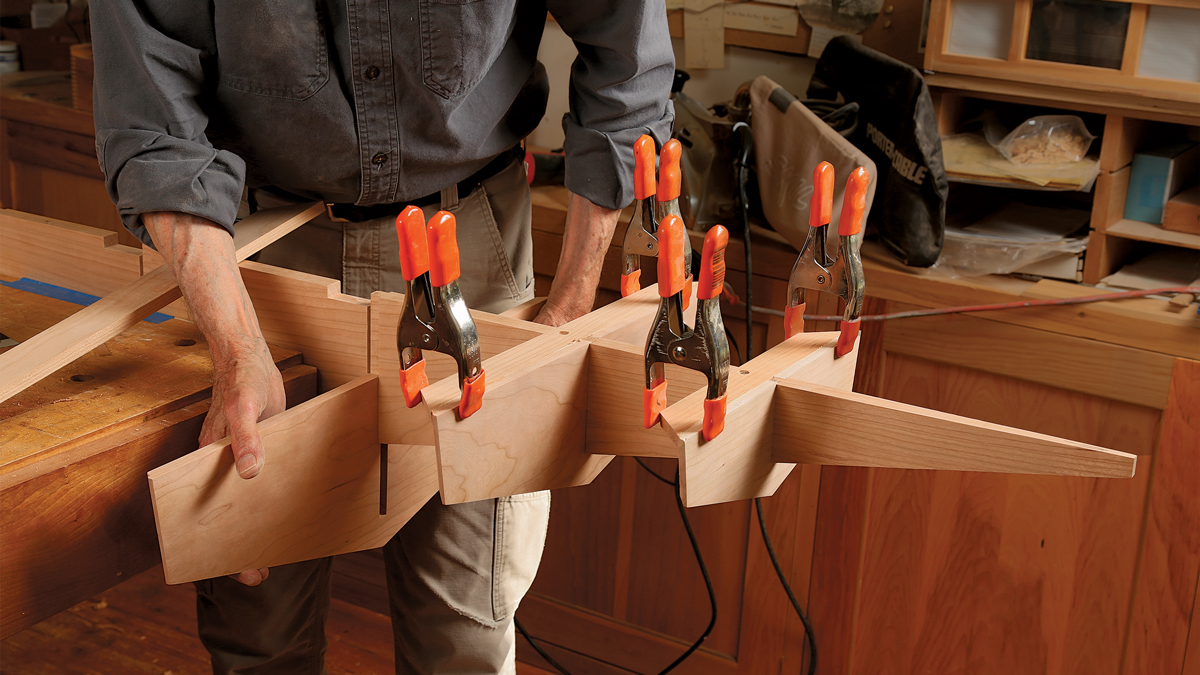
Shelf supports add strength
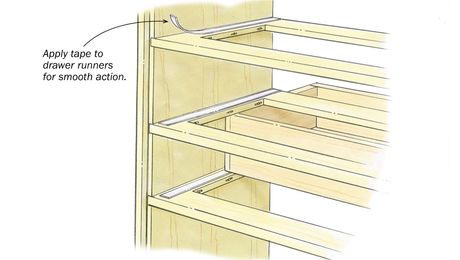
The shelf supports are next. Like the shelves, they vary in size, though all are 3⁄8 in. thick. The supports for the two large shelves are 1-3⁄4 in. wide, while the three smaller shelves have 1-1⁄4-in.-wide supports. To lay out the notches in the rib that accept the supports, slide the shelves temporarily in place. Hold a support under its shelf in the back, making sure it is perfectly flush with the shelf. Then mark the width on the back of the rib. Repeat and the third and fourth shelves.
 From Fine Woodworking #288
To view the entire article, please click the View PDF button below.


Comments
I like the design. I noticed in the photos you included several rows of holes, and a bent brass “bookend” for the widest shelf. Can you provide any details on how you bend that, or where to purchase?
I have the same question, what size is the brass stock.
I went ahead and made the call. I used 9/64 dia. brass stock 12" long. Bent the brass around a paint can and smoothed the ends on a grinder. I used peg board and a vix bit to make the holes. Worked well and pleased with the outcome. I think 1/8" stock would work as well.
Log in or create an account to post a comment.
Sign up Log in